Description
This document describes the procedure for manually operating cranked electric points.
Not what you are looking for? See more Procedures
Introduction
If the Signaller has given authority, cranked electric points machines may be operated manually with a crankhandle.
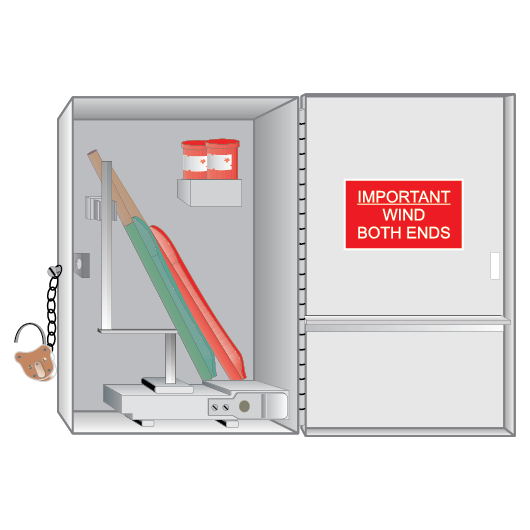
An Emergency Switch Machine Lock (ESML) cabinet for the points contains a crankhandle. The crankhandle is welded to its own Annett key, which locks it in place in the ESML cabinet.
Westinghouse points machines have a crankhole either on the top or the side of the machine.
Nippon points machines have a crankhole on the top of the machine.
GEC points machines have a crankhole at the end of the machine.
Switching to trackside control
Qualified Worker
- Find the correct ESML cabinet for the points.
- Unlock the cabinet with an SL or ESML key. You may have to get an ESML key from the signal box, or from a designated location.
- If there are instructions in the cabinet to help you to operate the points correctly, read and follow them.
- Turn the crankhandle to release its attached key from the Annett lock.
- Take the crankhandle from the cabinet. Removing it:
- switches the points machines to trackside control, and
- sets the protecting signals at STOP.
- Check the crankhandle label to make sure that you have the correct one.
- Make sure that protecting signals are at STOP.
Winding the points
Qualified Worker
- Check the position of the points at each switch machine. Make sure that your changes set the correct route.
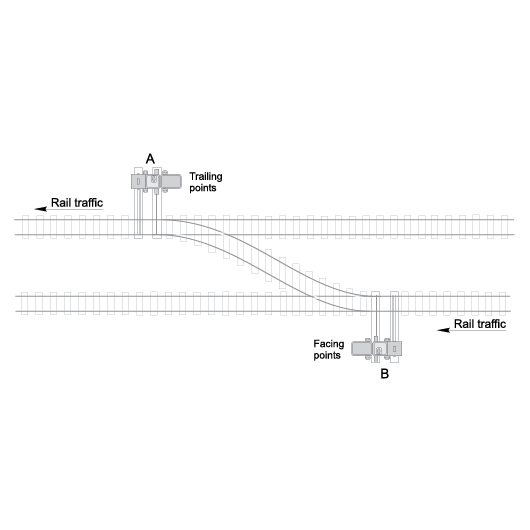
Operate switch machines at crossovers in order from the trailing end to the facing end.
- Undo the SL lock on the cover of the crankhandle hole. Uncover the hole.
- For Nippon machines, move aside the metal collar in the crankhandle hole.
- Insert the crankhandle. You may have to ‘feel’ the crankhandle back and forth to engage it correctly.
- For Westinghouse machines, push firmly on the crankhandle to engage the gearing fully.
- Wind the crankhandle to move the points to the correct setting.
- Continue winding after the switch rail first touches the stock rail. Wind until you cannot wind any further.
- Make sure that the switch rail is hard against the stock rail.
- Take the crankhandle from the points machine.
A crankhandle left in a machine may damage passing rail traffic or the equipment.
- Get instructions from the Signaller.
Returning to signal box control
Qualified Worker
- Replace the crankhandle hole cover. For Nippon machines, return the metal collar in the hole to the central position before closing the cover.
- Secure the crankhandle hole cover with the SL lock.
- Replace the crankhandle in the ESML cabinet. Turn the crankhandle to secure it in the Annett lock.
- Lock the cabinet.
- Ask the Signaller to test the points.
- Confirm with the Signaller that the points operate correctly.
- If the points do not operate correctly, get instructions from the Signaller.